How to Reset Magento Admin Password from Database

Hello everyone… Happy meet again after too long time I posted the article in 

OK, in this momen I will share my bad experience that had lost my admin passwordforgot-password.

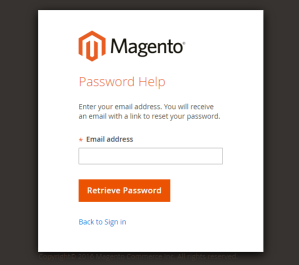
Actually, in magento we able to reset our password by forgot password feature. System will send us an email of reset password link automatically after we input registered email.

But how if your environment didn’t have an email services or internet connection (eg: isolated local system)? we wouldn’t get any reset email from system. So, we should reset password from Database.

By this article, I will give trick to reset magento admin password for Magento 1.x and Magento 2.x

1. Find your Database

We must to make sure which one DB we will run the querry.

  • in Magento 1.X we will found it in app/etc/local.xml
  • in magento 2.x we can open it in app/etc/env.php

2. Run the querry

Select the corresponding database from the drop-down menu on the left side. After that click on the SQL tab in order to be able to execute the following MySQL query. Note that the query will differ depending on the Magento version you have:

  • Magento 1.9 and older:

  • Magento 2:

Make sure that you substitute the following variables:

admin_user – this is database table from the Magento database. Bear in mind that this table may have a prefix such as “mg_” or a different one. You will see the prefix of the database (if any) once you access the phpMyAdmin tool and select the the Magento database. If there is a prefix you should replace the admin_user name with the correct database table name, e.g. mg_admin_user.

YOUR_NEW_PASSWORD – the desired password which you want to be set. The xx..xx character sequence is a cryptographic salt. It can be anything you want, but make sure you use the same value in both parts of the SQL statement.

YOUR_ADMIN_USERNAME – your Magento administrative username, i.e. admin.

xxxxxxxx – the secret key generated for your Magento installation. The key can be obtained from the configuration file of the application, mentioned at the beginning of this article.

Execute the query and your new Magento password will be set.


Magento – MySQL server has gone away (Mac)

Sometimes when we install magento with big size database, we will get unstable database. We often get error message “MySQL server has gone away”.  Maybe in the first time we will assume that it’s caused by not correct xml configuration (local.xml). So that we try for many times about mysql user setting.

If we still got error maybethe problem it’s not about your xml, please check your mysql buffer size. To check that configuration you can follow these steps:

  1. Find the correct my.cf file with this command: “mysql –verbose –help | grep my.cnf”
  2.  Change/add your configuration size with following value
    max-allowed-packet              = 1024M
    wait-timeout                    = 7200
    innodb-log-file-size            = 2047M
    innodb-log-buffer-size         = 8M
    innodb-log-buffer-size         = 32M
  3. Running these following query in your Mysql editor
    SET GLOBAL wait_timeout = 7200;
    SET GLOBAL max_allowed_packet = 1000000000;
    SET GLOBAL net_buffer_length = 1000000;
  4. Restart your mysql

in Mac :

sudo launchctl unload -F /Library/LaunchDaemons/com.oracle.oss.mysql.mysqld.plist
sudo launchctl load -F /Library/LaunchDaemons/com.oracle.oss.mysql.mysqld.plist

in Linux:

sudo service mysqld restart

How to Reset autoincrement in Microsoft SQL Server 2008 R2

To reset autoincrement of table in microsoft SQL Server 2008, you can use the DBCC CHECKIDENT command:

 DBCC CHECKIDENT ("YourTableNameHere", RESEED, 1);

But use with CAUTION! – this will just reset the IDENTITY to 1 – so your next inserts will get values 1, then 2, and then 3 –> and you’ll have a clash with your pre-existing value of 3 here!

IDENTITY just dishes out numbers in consecutive order – it does NOT in any way make sure there are no conflicts! If you already have values – do not reseed back to a lower value!

Magento get order details

Magento get order details

We will explain both methods to load order detials. Let us start one by one. First let us go with entity id ie. real order id –

Get-Order-Details-from-Order-ID-in-Magento

Magento load order detail by Order Id (Entity id)

If you know real order id ie. entity id you can load order detail as below-

Load Order by Order Id :

Magento load order detail by Order Increment Id

If you know real order increment id you can load order detail as below-

Load Order by Increment Id :

Tip : You can get real order id from order increment id.

Magento get order items collection

Let us get order items collection from above order details-

Get Order Items Detail:

Magento get Order Id From Increment Id

You can get magento real order id from increment id as below-

Get Real Order Id From Increment Id:


-More Details From Order-

Let us have a look on other details from magento order –


Magento get Order Status

You can get order status in magento as below –

Get Order Status :

Magento get Shipping And Billing Address From Order

You can get Shipping And Billing Address From Order in magento as below –

Get Shipping And Billing Address From Order :

Magento get Shipping Method From Order

You can get Shipping Method from order in magento as below –

Get Shipping Method from Order:

Magento get Payment Method From Order

You can get Payment Method from order in magento as below –

Get Payment Method from Order:

Add Twitter Bootstrap And JQuery In Laravel 5 Using Bower

Adding Twitter Bootstrap and Jquery to application (Laravel 5) got so simple it’s almost embarrassing that I’ve committed bootstrap.min.css to my project repo in the past.

First step we can change directory into root project directory. Update composer and run sudo npm install in project root to get bootstrap-sass and laravel-elixir. You can also get bootstrap with bower (see below) but you need laravel-elixir.

$ composer update

$ npm install Continue reading

Sharing and Updating Projects

Sharing and Updating Projects

Git doesn’t have a central server like Subversion. All of the commands so far have been done locally, just updating a local database. To collaborate with other developers in Git, you have to put all that data on a server that the other developers have access to. The way Git does this is to synchronize your data with another repository. There is no real difference between a server and a client – a Git repository is a Git repository and you can synchronize between any two easily.

Once you have a Git repository, either one that you set up on your own server, or one hosted someplace like GitHub, you can tell Git to either push any data that you have that is not in the remote repository up, or you can ask Git to fetch differences down from the other repo.

You can do this any time you are online, it does not have to correspond with a commit or anything else. Generally you will do a number of commits locally, then fetch data from the online shared repository you cloned the project from to get up to date, merge any new work into the stuff you did, then push your changes back up.

In a nutshell you can update your project with git fetch and share your changes with git push. You can manage your remote repositories with git remote.

docs   book git remote list, add and delete remote repository aliases

Unlike centralized version control systems that have a client that is very different from a server, Git repositories are all basically equal and you simply synchronize between them. This makes it easy to have more than one remote repository – you can have some that you have read-only access to and others that you can write to as well.

So that you don’t have to use the full URL of a remote repository every time you want to synchronize with it, Git stores an alias or nickname for each remote repository URL you are interested in. You use the git remote command to manage this list of remote repos that you care about.

git remote list your remote aliases

Without any arguments, Git will simply show you the remote repository aliases that it has stored. By default, if you cloned the project (as opposed to creating a new one locally), Git will automatically add the URL of the repository that you cloned from under the name ‘origin’. If you run the command with the -v option, you can see the actual URL for each alias.

$ git remote
origin
$ git remote -v
origin	git@github.com:github/git-reference.git (fetch)
origin	git@github.com:github/git-reference.git (push)

You see the URL there twice because Git allows you to have different push and fetch URLs for each remote in case you want to use different protocols for reads and writes.

git remote add add a new remote repository of your project

If you want to share a locally created repository, or you want to take contributions from someone else’s repository – if you want to interact in any way with a new repository, it’s generally easiest to add it as a remote. You do that by running git remote add [alias] [url]. That adds [url] under a local remote named [alias].

For example, if we want to share our Hello World program with the world, we can create a new repository on a server (Using GitHub as an example), which should give you a URL, in this case “git@github.com:schacon/hw.git”. To add that to our project so we can push to it and fetch updates from it we would do this:

$ git remote
$ git remote add github git@github.com:schacon/hw.git
$ git remote -v
github	git@github.com:schacon/hw.git (fetch)
github	git@github.com:schacon/hw.git (push)

Like the branch naming, remote alias names are arbitrary – just as ‘master’ has no special meaning but is widely used because git init sets it up by default, ‘origin’ is often used as a remote name because git clone sets it up by default as the cloned-from URL. In this case we’ll name the remote ‘github’, but you could name it just about anything.

git remote rm removing an existing remote alias

Git addeth and Git taketh away. If you need to remove a remote – you are not using it anymore, the project is gone, etc – you can remove it with git remote rm [alias].

$ git remote -v
github	git@github.com:schacon/hw.git (fetch)
github	git@github.com:schacon/hw.git (push)
$ git remote add origin git://github.com/pjhyett/hw.git
$ git remote -v
github	git@github.com:schacon/hw.git (fetch)
github	git@github.com:schacon/hw.git (push)
origin	git://github.com/pjhyett/hw.git (fetch)
origin	git://github.com/pjhyett/hw.git (push)
$ git remote rm origin
$ git remote -v
github	git@github.com:schacon/hw.git (fetch)
github	git@github.com:schacon/hw.git (push)

git remote rename [old-alias] [new-alias] rename remote aliases

If you want to rename remote aliases without having to delete them and add them again you can do that by running git remote rename [old-alias] [new-alias]. This will allow you to modify the current name of the remote.

$ git remote add github git@github.com:schacon/hw.git
$ git remote -v
github	git@github.com:schacon/hw.git (fetch)
github	git@github.com:schacon/hw.git (push)
$ git remote rename github origin
$ git remote -v
origin	git@github.com:schacon/hw.git (fetch)
origin	git@github.com:schacon/hw.git (push)

In a nutshell with git remote you can list our remote repositories and whatever URL that repository is using. You can use git remote add to add new remotes, git remote rm to delete existing ones or git remote rename [old-alias] [new-alias] to rename them.

git remote set-url update an existing remote URL

Should you ever need to update a remote’s URL, you can do so with the git remote set-url command.

$ git remote -v
github	git@github.com:schacon/hw.git (fetch)
github	git@github.com:schacon/hw.git (push)
origin	git://github.com/pjhyett/hw.git (fetch)
origin	git://github.com/pjhyett/hw.git (push)
$ git remote set-url origin git://github.com/github/git-reference.git
$ git remote -v
github	git@github.com:schacon/hw.git (fetch)
github	git@github.com:schacon/hw.git (push)
origin	git://github.com/github/git-reference.git (fetch)
origin	git://github.com/github/git-reference.git (push)

In addition to this, you can set a different push URL when you include the --push flag. This allows you to fetch from one repo while pushing to another and yet both use the same remote alias.

$ git remote -v
github	git@github.com:schacon/hw.git (fetch)
github	git@github.com:schacon/hw.git (push)
origin	git://github.com/github/git-reference.git (fetch)
origin	git://github.com/github/git-reference.git (push)
$ git remote set-url --push origin git://github.com/pjhyett/hw.git
$ git remote -v
github	git@github.com:schacon/hw.git (fetch)
github	git@github.com:schacon/hw.git (push)
origin	git://github.com/github/git-reference.git (fetch)
origin	git://github.com/pjhyett/hw.git (push)

Internally, the git remote set-url command calls git config remote, but has the added benefit of reporting back any errors. git config remote on the other hand, will silently fail if you mistype an argument or option and not actually set anything.

For example, we’ll update the github remote but instead reference it as guhflub in both invocations.

$ git remote -v
github	git@github.com:schacon/hw.git (fetch)
github	git@github.com:schacon/hw.git (push)
origin	git://github.com/github/git-reference.git (fetch)
origin	git://github.com/github/git-reference.git (push)
$ git config remote.guhflub git://github.com/mojombo/hw.git
$ git remote -v
github	git@github.com:schacon/hw.git (fetch)
github	git@github.com:schacon/hw.git (push)
origin	git://github.com/github/git-reference.git (fetch)
origin	git://github.com/github/git-reference.git (push)
$ git remote set-url guhflub git://github.com/mojombo/hw.git
fatal: No such remote 'guhflub'

In a nutshell, you can update the locations of your remotes with git remote set-url. You can also set different push and fetch URLs under the same remote alias.
docs   book git fetch download new branches and data from a remote repository

docs   book git pull fetch from a remote repo and try to merge into the current branch

Git has two commands to update itself from a remote repository. git fetch will synchronize you with another repo, pulling down any data that you do not have locally and giving you bookmarks to where each branch on that remote was when you synchronized. These are called “remote branches” and are identical to local branches except that Git will not allow you to check them out – however, you can merge from them, diff them to other branches, run history logs on them, etc. You do all of that stuff locally after you synchronize.

The second command that will fetch down new data from a remote server is git pull. This command will basically run a git fetch immediately followed by a git merge of the branch on that remote that is tracked by whatever branch you are currently in. Running the fetch and merge commands separately involves less magic and less problems, but if you like the idea of pull, you can read about it in more detail in the official docs.

Assuming you have a remote all set up and you want to pull in updates, you would first run git fetch [alias] to tell Git to fetch down all the data it has that you do not, then you would run git merge [alias]/[branch] to merge into your current branch anything new you see on the server (like if someone else has pushed in the meantime). So, if you were working on a Hello World project with several other people and wanted to bring in any changes that had been pushed since we last connected, we would do something like this:

$ git fetch github
remote: Counting objects: 4006, done.
remote: Compressing objects: 100% (1322/1322), done.
remote: Total 2783 (delta 1526), reused 2587 (delta 1387)
Receiving objects: 100% (2783/2783), 1.23 MiB | 10 KiB/s, done.
Resolving deltas: 100% (1526/1526), completed with 387 local objects.
From github.com:schacon/hw
   8e29b09..c7c5a10  master     -> github/master
   0709fdc..d4ccf73  c-langs    -> github/c-langs
   6684f82..ae06d2b  java       -> github/java
 * [new branch]      ada        -> github/ada
 * [new branch]      lisp       -> github/lisp

Here we can see that since we last synchronized with this remote, five branches have been added or updated. The ‘ada’ and ‘lisp’ branches are new, where the ‘master’, ‘c-langs’ and ‘java’ branches have been updated. In our example case, other developers are pushing proposed updates to remote branches for review before they’re merged into ‘master’.

You can see the mapping that Git makes. The ‘master’ branch on the remote repository becomes a branch named ‘github/master’ locally. That way you can merge the ‘master’ branch on that remote into the local ‘master’ branch by running git merge github/master. Or, you can see what new commits are on that branch by running git log github/master ^master. If your remote is named ‘origin’ it would be origin/master instead. Almost any command you would run using local branches you can use remote branches with too.

If you have more than one remote repository, you can either fetch from specific ones by running git fetch [alias] or you can tell Git to synchronize with all of your remotes by running git fetch --all.

In a nutshell you run git fetch [alias] to synchronize your repository with a remote repository, fetching all the data it has that you do not into branch references locally for merging and whatnot.

docs   book git push push your new branches and data to a remote repository

To share the cool commits you’ve done with others, you need to push your changes to the remote repository. To do this, you run git push [alias] [branch] which will attempt to make your [branch] the new [branch] on the [alias] remote. Let’s try it by initially pushing our ‘master’ branch to the new ‘github’ remote we created earlier.

$ git push github master
Counting objects: 25, done.
Delta compression using up to 2 threads.
Compressing objects: 100% (25/25), done.
Writing objects: 100% (25/25), 2.43 KiB, done.
Total 25 (delta 4), reused 0 (delta 0)
To git@github.com:schacon/hw.git
 * [new branch]      master -> master

Pretty easy. Now if someone clones that repository they will get exactly what we have committed and all of its history.

What if you have a topic branch like the ‘erlang’ branch created earlier and want to share just that? You can just push that branch instead.

$ git push github erlang
Counting objects: 7, done.
Delta compression using up to 2 threads.
Compressing objects: 100% (6/6), done.
Writing objects: 100% (6/6), 652 bytes, done.
Total 6 (delta 1), reused 0 (delta 0)
To git@github.com:schacon/hw.git
 * [new branch]      erlang -> erlang

Now when people clone or fetch from that repository, they’ll get an ‘erlang’ branch they can look at and merge from. You can push any branch to any remote repository that you have write access to in this way. If your branch is already on the server, it will try to update it, if it is not, Git will add it.

The last major issue you run into with pushing to remote branches is the case of someone pushing in the meantime. If you and another developer clone at the same time, you both do commits, then she pushes and then you try to push, Git will by default not allow you to overwrite her changes. Instead, it basically runs git log on the branch you’re trying to push and makes sure it can see the current tip of the server’s branch in your push’s history. If it can’t see what is on the server in your history, it concludes that you are out of date and will reject your push. You will rightly have to fetch, merge then push again – which makes sure you take her changes into account.

This is what happens when you try to push a branch to a remote branch that has been updated in the meantime:

$ git push github master
To git@github.com:schacon/hw.git
 ! [rejected]        master -> master (non-fast-forward)
error: failed to push some refs to 'git@github.com:schacon/hw.git'
To prevent you from losing history, non-fast-forward updates were rejected
Merge the remote changes before pushing again.  See the 'Note about
fast-forwards' section of 'git push --help' for details.

You can fix this by running git fetch github; git merge github/master and then pushing again.

Get Product Price With Locale Format

To get product price with your locale magento currency format you can use currency function like the following code

$category_id = 5;
Mage::app();
$category = Mage::getModel(‘catalog/category’)->load($category_id);
$products = $category
->getProductCollection()
->addAttributeToSelect(‘*’)
->addAttributeToFilter(‘status’, 1)
->addAttributeToFilter(‘visibility’, 4)->addAttributeToSelect(‘image’)
->addAttributeToFilter(‘special_price’, array(‘neq’ => “”))
->setOrder(‘price’, ‘ASC’);

foreach ($products as $product) {

Mage::helper(‘core’)->currency($product->getPrice(), true, false); //get price with locale currency format

}

Get Product List From Category From Anywhere

To get Product list from any category we can load product if we know an ID category eg: Fashion Category have ID 5.

require_once($_SERVER[‘DOCUMENT_ROOT’].”/app/Mage.php”);
$category_id = 5;
Mage::app();
$category = Mage::getModel(‘catalog/category’)->load($category_id);
$products = $category
->getProductCollection()
->addAttributeToSelect(‘*’)
->addAttributeToFilter(‘status’, 1)
->addAttributeToFilter(‘visibility’, 4)->addAttributeToSelect(‘image’)
->addAttributeToFilter(‘special_price’, array(‘neq’ => “”))
->setOrder(‘price’, ‘ASC’);

foreach ($products as $product) {

$product->getName();//get poduct name

$product->getPrice();//get product price

Mage::helper(‘catalog/image’)->init($product, ‘small_image’)->resize(250,250);//get product thumbnail

$product->getProductUrl(); //get product URL

}

(WordPress) Cerate Dynamic Footer Menu

To create dynamic menu in footer we have to add a function in function.php file. We can edit this file directly or via wordpress dashboard.

WordPress dynamic footer menu

Direct Way
Open file in wordpress/wp-content/themes/{active-themes}/function.php

Function.php file location

and then add following code

function register_my_menu() {
register_nav_menus(
array(
‘left-footer-menu’ => __( ‘Left Footer Menu’ ),
‘center-footer-menu’ => __( ‘Center Footer Menu’ ),
‘right-footer-menu-corporate’ => __( ‘Right Footer Menu Corporate’ ),
‘right-footer-menu-payment’ => __( ‘Right Footer Menu Payment’ )
)
);
}
add_action( ‘init’, ‘register_my_menu’ );

Edit via dashboard
Login into ypur wordpress dashboard

WordPress dashboard editor
  1. Open Appearance -> Editor
  2. Select your active themes
  3. Open (click) function.php file in the right side menu
  4. Add your code into editor

Next we must add some line code into footer.php file to showing our menu in footer.

‘left-footer-menu’ ) ); ?>
‘center-footer-menu’ ) ); ?>
‘right-footer-menu-corporate’ ) ); ?>
‘right-footer-menu-payment’ ) ); ?>
add code into footer.php

Next step is creating menu that will add into footer

Footer menu

After finish those step we can refresh our wordpress frontpage and see the result

WordPress dynamic footer menu

Source: Supergatek.blogspot.co.id my others blog

List of Git Command

How to Using GIT?

The following are some commands that can be used to operate the GIT

1. How to Install git

    sudo apt-get install git-core

– optional:

    sudo apt-get install gitk

2. Config

    git config user.name "Fuad Abdul Jabbar"
    git config user.email "fuad_abd_jabbar@yahoo.co.id"

cek output:

    git config user.name
    git config user.email
    ~/.gitconfig

3. Clone git repository

    git://github.com/ruckuus/NgeGitting.git

4. Create git repository

	git init
	git add .

Continue reading